

Time:2026-05-27
Commercial buildings are changing rapidly. In 2026, building owners want more than simple light switches. They want automated systems that cut energy costs and meet strict environmental laws. One popular solution is daylight harvesting. This system uses natural light from windows and skylights to lower artificial light levels.
When a system works correctly, it cuts energy costs by up to 60%. It also keeps office workers comfortable. However, many field installations run into severe operational problems. The main issue is daylight harvesting control calibration. If a technician setups a photo sensor incorrectly, the entire energy-saving plan drops.
This guide digs deep into why these setups fail on-site. We will show you how to fix these issues. We will also look at how to choose alternative hardware that stays accurate for years.
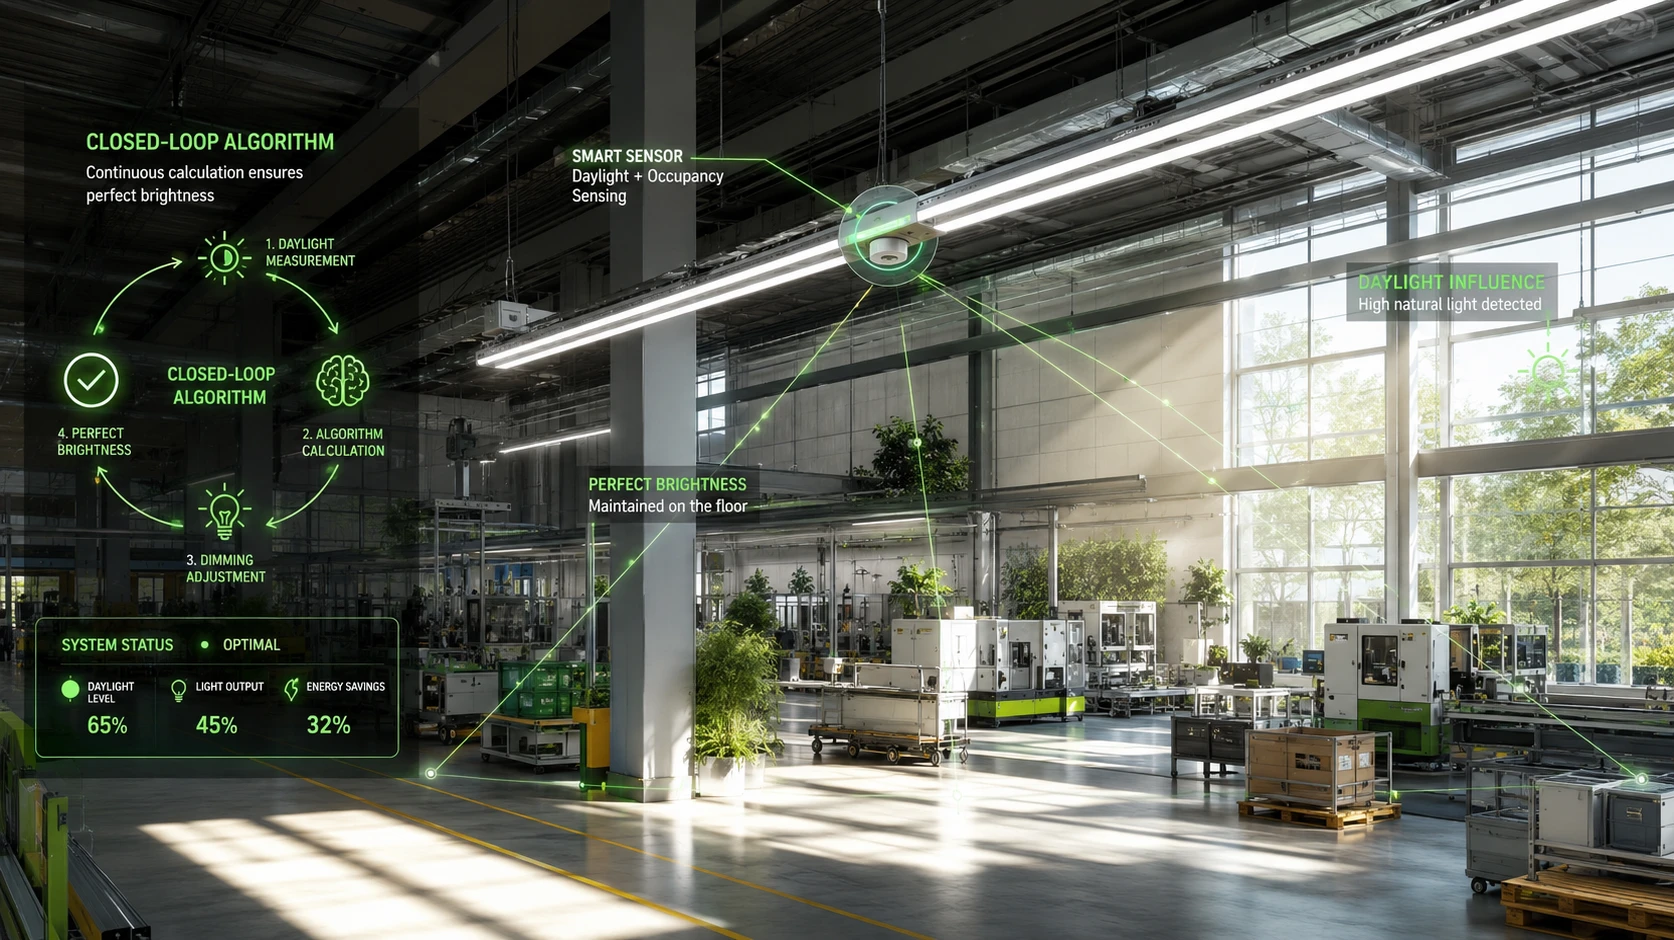
Daylight harvesting relies on a simple and reliable technical logic. First, the total ambient light in a room is made up of two sources: natural daylight from windows and artificial LED light from the ceiling fixtures. A photo sensor constantly reads the total sum of this ambient light.
Next, the sensor measures this specific light level in lux. It passes this data vector to a central controller. Finally, the controller reads the lux data. If natural light increases, the controller auto-dims the LED fixtures to maintain a stable target lux level across the room.
To make this continuous control loop work, you must execute a precise daylight harvesting control calibration. This setup process defines a clear baseline for the controller. It tells the software exactly what a specific sensor reading means in real-world desk lighting.
Without this accurate reference point, the system cannot make smart dimming choices. For B2B buyers and facility managers, proper calibration is the single choice that divides real energy savings from endless maintenance headaches.
Many smart lighting projects start with great energy goals but fail during actual use. Field studies show that a large percentage of daylighting systems do not save the expected amount of power. In fact, some systems cause building occupants to complain so much that managers turn the system off entirely.
Understanding these common failure points helps engineering teams prevent costly mistakes before breaking ground on a project.
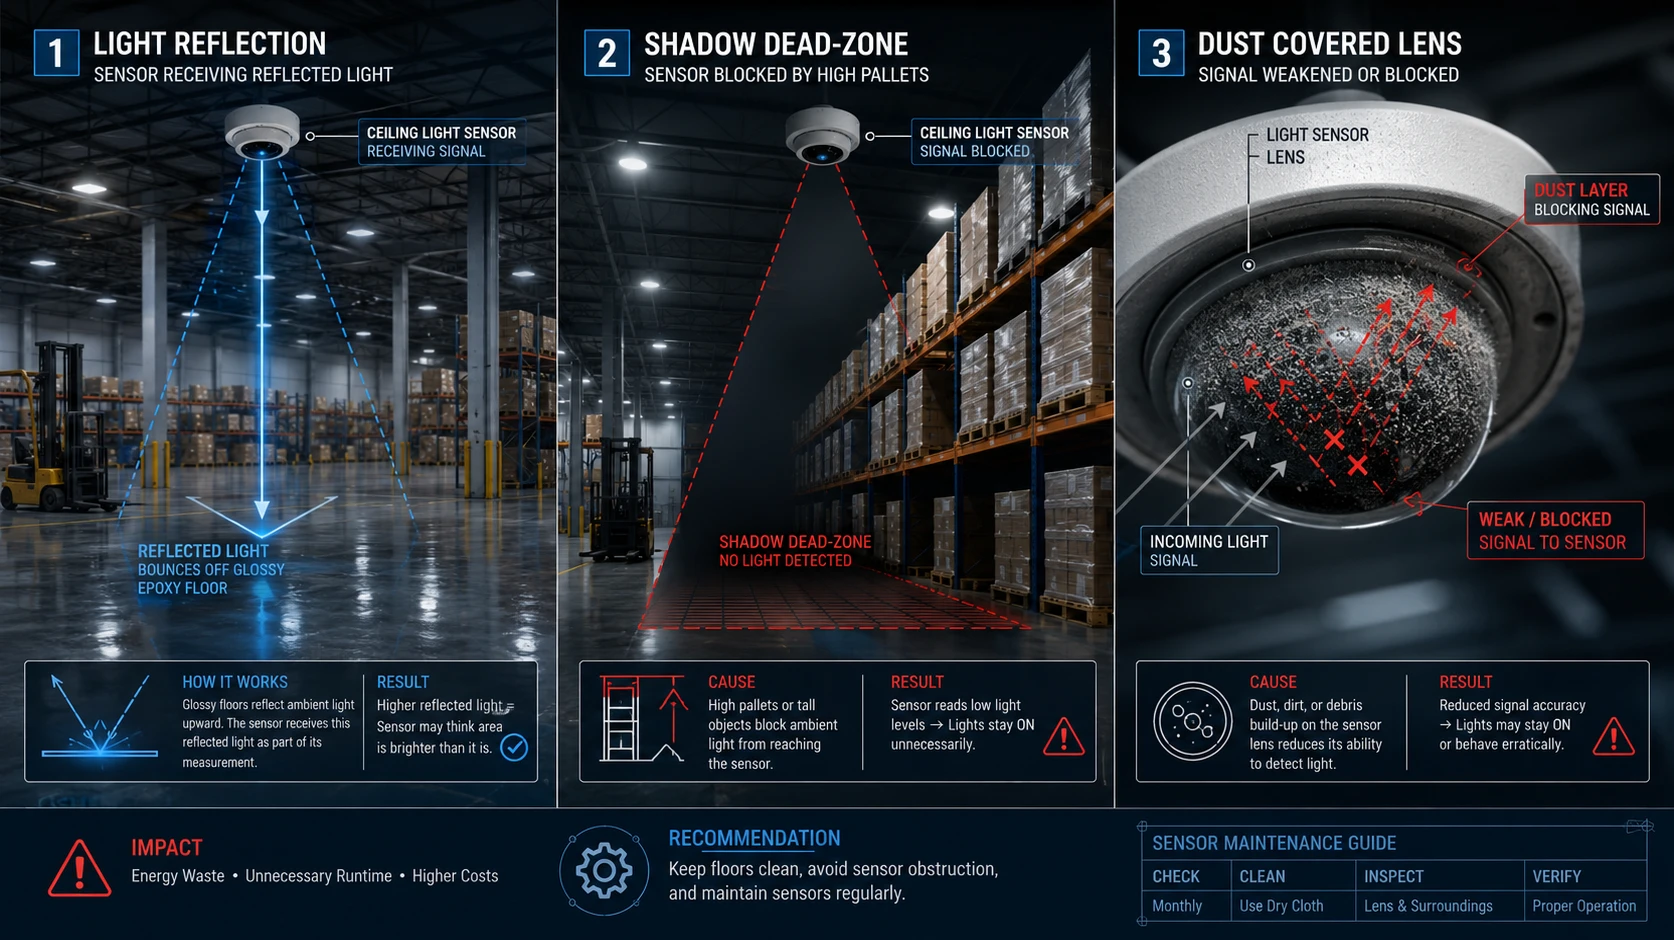
The most common mistake happens during the initial system setup. Many field crews perform the system calibration during a single visit at noon on a clear, sunny day. This choice creates a major technical error.
A single noon reading does not show how natural light shifts throughout the seasons. As days get shorter in winter, the morning and afternoon light entry points change. A system set up only for summer noon light will fail during winter mornings, causing the lights to dim or brighten at the wrong times.
Commercial buildings do not exist in an empty field. Nearby high-rise towers, trees, and internal window blinds create shifting shadows. A photo sensor placed near a window might be in a deep building shadow at 10:00 AM while the rest of the office floor is flooded with bright sunlight.
This localized shadow confuses the sensor. The sensor reads a dark environment and tells the controller to turn the artificial lights up to 100% power. This error ruins your energy-saving plans and creates uneven light across the office floor.
Many budget-focused hardware vendors use cheap plastic lenses on their photo sensors. Over time, these lenses degrade from exposure to UV sunlight. In industrial spaces like warehouses and factories, airborne dust and oil vapors collect on the sensor glass.
This physical dust layer blocks natural light from reaching the internal sensor chip. As a result, the sensor thinks the room is dark. It triggers an early turn-on cycle for the high-output LED high-bays. This issue defeats the entire purpose of your green building strategy and drives up operational costs.
Fixing a failing system requires a structured, multi-point approach. Field technicians can use these four proven steps to correct calibration errors and lock in long-term energy savings.
Never rely on a single light reading. To achieve a stable system setup, field crews must take two distinct light measurements:
The Nighttime/Dark Benchmark: Turn off all natural light by closing heavy window blinds or waiting until nightfall. Turn the LED fixtures on to full power. Use a handheld lux meter to measure the light at desk height. Save this sensor reading as your base artificial light level.
The Daytime Peak Benchmark: Open the window blinds on a clear day. Measure the combined light from the sun and the dimmed LEDs. This two-point reading gives the controller a clear map of how the room transitions from dark to light.
Sensor placement is critical. Never mount a photo sensor directly above a reflective desk surface or right next to a bright window wall.
Instead, install the sensor on the ceiling at a distance equal to two times the window height. This placement allows the sensor to capture an accurate mix of room light rather than a single, extreme point of bright sunlight.
Clouds move across the sky quickly on windy days. If a sensor responds to every passing cloud, the office lights will dim and brighten every few seconds. This constant shifting drives office workers crazy.
To fix this problem, technicians should program a 5-minute to 10-minute fade delay into the control software. This buffer ensures that the lights transition smoothly over several minutes, making the changes completely invisible to human occupants.
Modern smart building layouts increasingly move away from traditional high-voltage wiring. Sourcing alternative sensors that run on a safe, low-voltage 12V/24V DC input loop brings massive financial and structural benefits to commercial projects.
Traditional line-voltage systems require thick copper wiring, heavy junction boxes, and rigid metal conduit. They also require expensive, certified electricians to handle the hazardous high-voltage lines. This setup drives up labor costs and slows down construction schedules.
In contrast, a low-voltage DC setup changes the installation process completely:
Faster Routing: Low-voltage wires can be routed quickly through open drop ceilings without rigid metal pipes.
Lower Labor Costs: General data technicians can handle the entire low-voltage sensor layout safely.
Easier Adjustments: If an interior wall moves during an office remodel, moving a low-voltage sensor takes minutes instead of hours of electrical conduit rework.
By switching to a low-voltage hardware foundation, project teams lower material expenses and accelerate completion timelines.
On-site system tuning is historically one of the biggest hidden costs in commercial property management. Older control networks forced field crews to physically climb tall ladders to turn tiny mechanical dials on the ceiling sensor housing. This manual process is slow, dangerous, and mathematically imprecise.
Modern alternative hardware avoids these maintenance traps entirely by moving all controls to easy-to-use wireless software apps. The management process follows a highly efficient digital workflow:
App Initiation: The field data technician launches a wireless mobile application on a smartphone or tablet from the safety of the floor.
Network Discovery: The application completes an over-the-air network discovery scan to find all local wireless sensor nodes.
Secure Connection: The technician establishes a secure connection using a unique, encrypted cryptographic token to prevent unauthorized access.
Parameter Adjustment: Once inside the interface, the technician can wirelessly adjust motion hold times, set target daylight harvesting lux benchmarks, and fine-tune daylight curves.
Bulk Wireless Push: After refining the settings, the app executes an instant bulk wireless push, updating all local sensor nodes simultaneously.
Field crews can adjust sensor sensitivity completely from the ground over the air using standard Bluetooth Low Energy (BLE) protocols. This remote setup helps an energy manager work much faster. They can update hold times, change lux limits, and complete a lighting sensor sensitivity adjustment across entire floors in minutes. This removes the need to rent expensive scissor lifts, saving thousands of dollars in facility management budgets.
When engineers write hardware specifications for enterprise properties, component validation is crucial for long-term risk mitigation. Sourcing high-quality sensors built on verified technical rules protects your investment and ensures system stability over a 10-year building lifecycle.
Alternative components must carry global approvals, such as the DesignLights Consortium (DLC) Networked Lighting Control technical requirements. This compliance ensures the sensors provide steady performance and qualify for local utility energy rebates.
Furthermore, premium alternative sensors do more than just dim lights. They act as active data collectors for the broader Internet of Things (IoT). When connected to a central Smart Gateway, these sensors stream continuous occupancy and environmental light updates to the cloud.
Corporate leadership can use this data to build complex Space Utilization Data Collection models. These models show exactly which meeting rooms are empty, track real-world energy reduction, and provide the exact proof needed for international corporate green compliance audits.
A: Traditional sensors often fail due to lens yellowing from UV light and internal dust accumulation. LumiEasy solves this by manufacturing sensors with premium, UV-stable optical lenses and a verified linear smart sensor ip rating (up to IP65/IP66). These tight seals block out fine dust and moisture, keeping your daylight harvesting control calibration perfectly accurate for years.
A: Yes. All LumiEasy sensors link directly to standard ble commissioning tools. Technicians can handle a complete lighting sensor sensitivity adjustment and set target lux levels remotely from a smartphone or tablet using native lumieasy tools. You never need to rent a scissor lift to re-calibrate a room.
A: Absolutely. LumiEasy sensors are built on standard Bluetooth Mesh models. They integrate smoothly as high-performance alternative sensors in systems running standard firmware layouts, working seamlessly with your existing central controller setup.
A: Yes. LumiEasy offers highly flexible electrical options. Our product catalog features low-voltage models running on a clean 12V/24V DC input loop for streamlined installation. We also provide standard line-voltage units for traditional electrical architectures, ensuring a perfect fit for any lighting control system.
A: Security is central to our hardware design. Every LumiEasy sensor utilizes enterprise-grade AES-128 cryptographic encryption keys. During the initial pairing phase, secure tokens are generated locally for each zone. This ensures that unauthorized users cannot access your wireless network, keeping your corporate asset data completely private.


)
)
)
)

+86 15899791249

+86 755 2955 3313


Address: Huafeng No.1 Science and Technology Park, Sanwei, Bao'an District, Shenzhen, Guangdong, China.
